We all know that CAPTCHAs can be frustrating, but they’re important to prevent spam on your WordPress site. Bots can flood your site with unwanted messages in various places, like contact forms and login pages.
While Google offers reCAPTCHA, there are privacy concerns related to using Google’s solutions. This is where Cloudflare’s Turnstile comes in. It’s a user-friendly CAPTCHA designed with privacy and user experience in focus.
Let’s enhance the user experience on our WordPress site by adding Cloudflare Turnstile.
Adding Cloudflare Turnstile to WordPress
The simplest way to add Turnstile to your WordPress site is by using the “Simple Cloudflare Turnstile” plugin.
The “Simple Cloudflare Turnstile” plugin includes Turnstile on various forms in WordPress, like login, registration, password reset, and comments. It also works with WooCommerce forms, such as login and checkout. Additionally, if you use Contact Form 7, there’s an option to prevent spam in contact forms.
Sign Up for Cloudflare and get a Free Cloudflare Turnstile
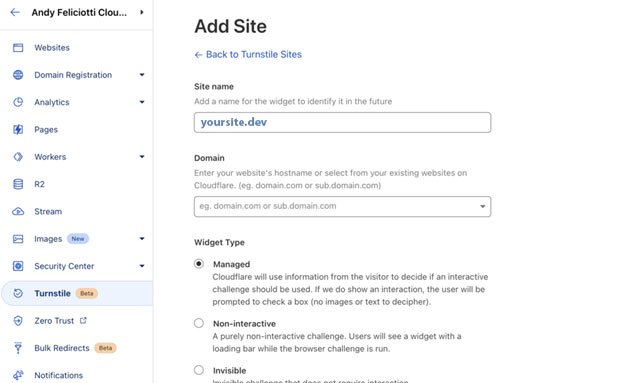
To begin, create a free account on Cloudflare. Once you’re signed up, you’ll find “Turnstile” in the side menu of your Cloudflare Dashboard. This is where you can set up your website and obtain a free API key required for the plugin.

Once you’ve provided your website’s name and domain, you can choose the type of widget you want. Usually, you’ll want to keep it on “managed.” Remember that you don’t have to direct your site through Cloudflare to use Turnstile.
Now, let’s install the Simple Cloudflare Turnstile plugin.
Install Simple Cloudflare Turnstile
Including Turnstile on your website is easy. Just log in to your WordPress admin area and install a plugin.
As with any plugin, you can search for “Simple Cloudflare Turnstile” in the “Plugins” section, then click “Add New.” You’ll find the plugin created by Elliot Sowersby. Once you’ve installed and activated the plugin, a new option called “Cloudflare Turnstile” will appear in your WordPress site’s settings menu.

The settings will require your site key and secret, which you receive once you add your site to the Cloudflare Turnstile dashboard. Once you input these values, you can easily enable Cloudflare Turnstile on specific parts of your website.
I suggest enabling it on the default WordPress forms and any contact forms you might have. If you’re using WooCommerce or Contact Form 7, you’ll find settings for those on this page too.
Additionally, there’s a choice between a dark or light theme for the Turnstile interface, which is a nice option to have.

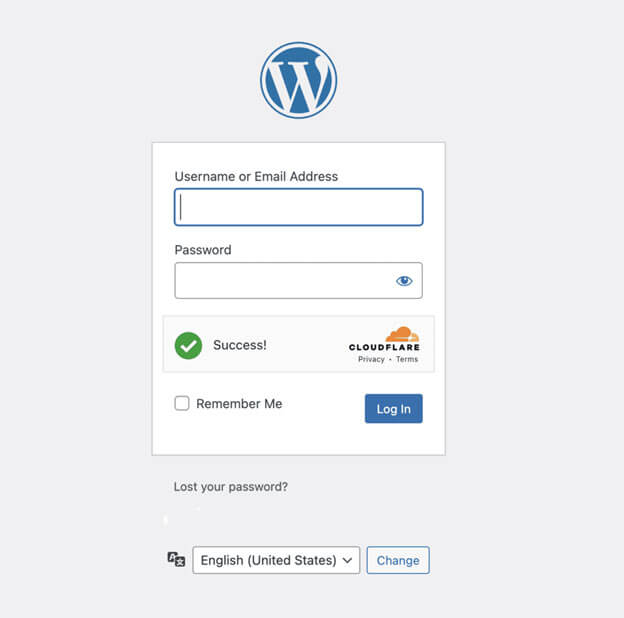
Once you save your settings, Cloudflare Turnstile will start appearing on your site! The great thing is that it will most likely work without you needing to click on anything, unlike reCAPTCHA.
View Cloudflare Turnstile Stats
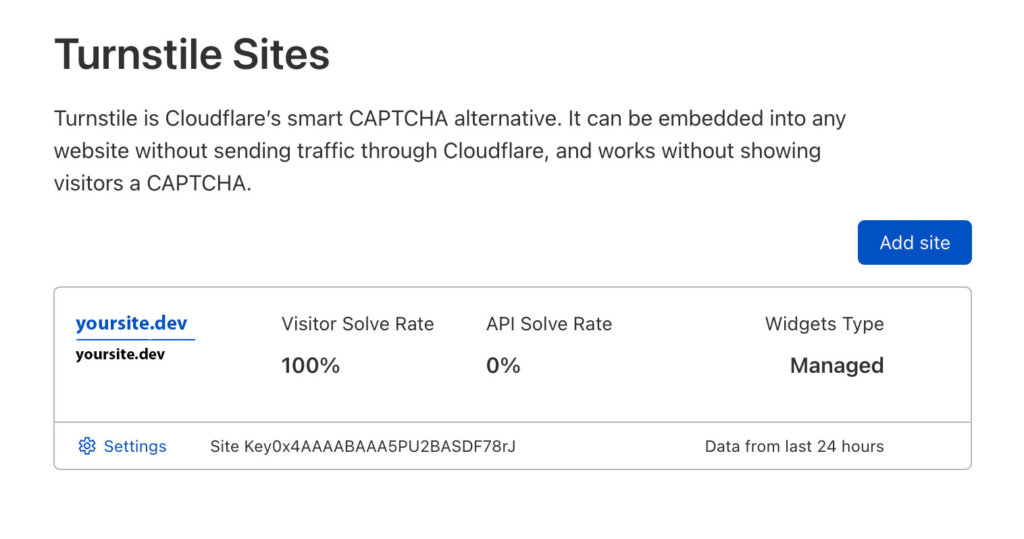
After you’ve turned on Cloudflare Turnstile for your WordPress site, you can also check the statistics to see how many users are successfully completing it. These stats can be found in your Cloudflare dashboard.

We hope this guide was helpful for adding Cloudflare Turnstile to your WordPress site. If you’re a WordPress developer, you might also find the Turnstile developer documentation useful.
Related Articles
Leave a Reply