Plugins are like helpful tools for your WordPress website. They can add new things and make your blog better. There are plugins for security, adding cool features, and much more.
You can install plugins in different ways, but we’ll show you the three easiest methods.
So, without waiting, let’s start right away!
How to Install a WordPress Plugin from the Admin Dashboard
To begin, you need to log in as the main person in charge of your WordPress site, called the administrator or admin. If you don’t have this role, you won’t find the option to add plugins on the side of your WordPress screen. If you’re not sure, ask the person who set up your WordPress site.
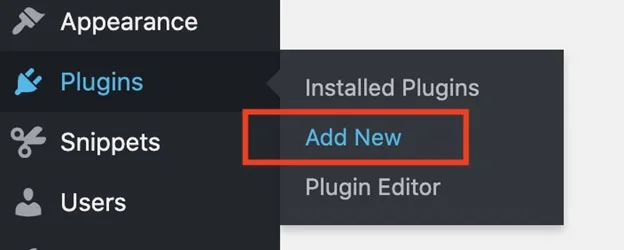
To put a plugin in WordPress, simply go to the sidebar of your WordPress dashboard and click on “Plugins” > “Add New”.
Once you click on “Add New,” a page will show up with lots of plugins for WordPress. At the top right, there’s a search bar where you can look for a certain plugin. When you find the one you want, just click on “Install Now” to begin putting the plugin into your website.
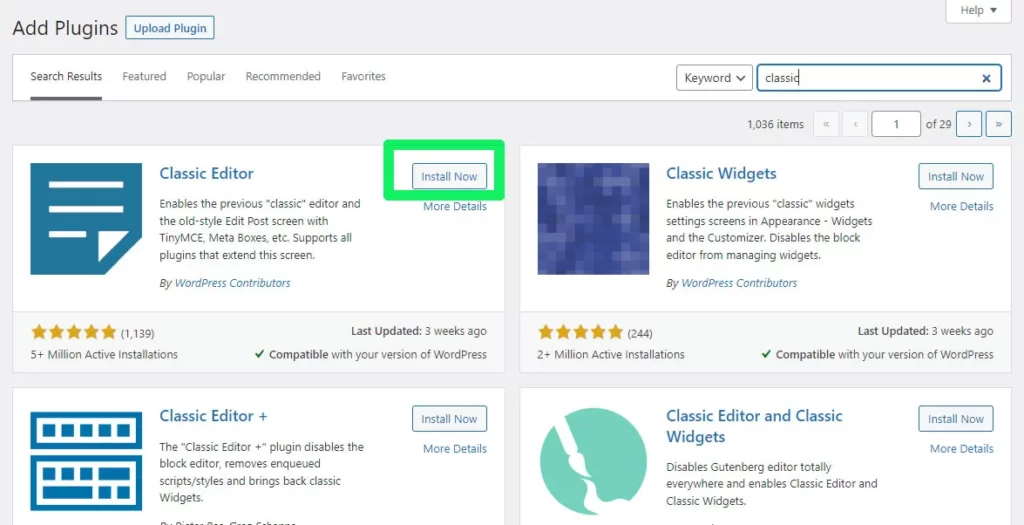
The plugin will need a little time to get installed, usually just a few seconds. Once it’s done, you can click on “Activate Now” to turn on the plugin for your website.
If you want to stop using the plugin, you can easily do it. Just go to “Plugins” > “Installed Plugins” to see the list of plugins you’ve turned on. You’ll find an option there to “deactivate” them.
How to Manually Install WordPress Plugin from a Zip File
Usually, when you purchase a special paid plugin for WordPress, you need to install it from a file called a zip file. This is quite similar to the method we talked about earlier and you can do it from your WordPress dashboard.
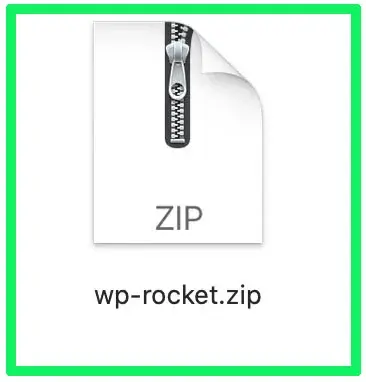
At the beginning, you’ll need to have the zip file you want to upload. Let’s take an example: we’ll use a plugin called WP-Rocket. When you get a premium WordPress plugin, they’ll usually give you a zip file to download.
Next, you should log in to your WordPress website and go to “Plugins” > “Add New”.

When you’re on this page, at the top, you’ll find a choice that says “Upload Plugin.”
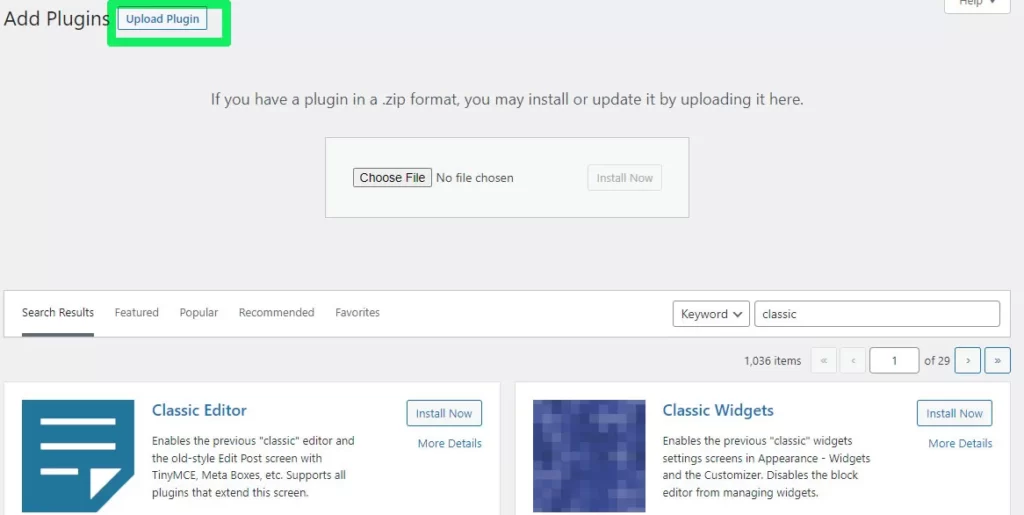
When you click on it, a box will appear where you can choose the zip file.
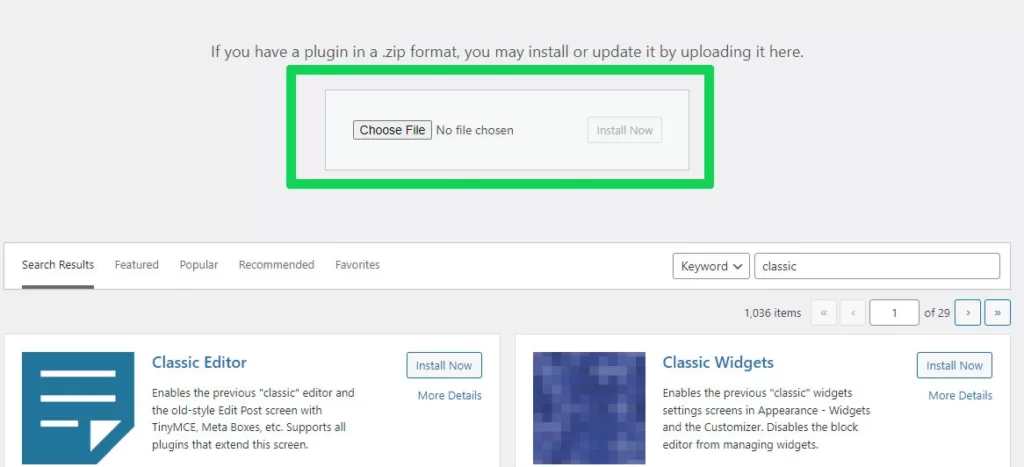
Pick your zip file and press the “Install Now” button. Once your zip file is uploaded, it will take you to a page where you can activate the plugin.
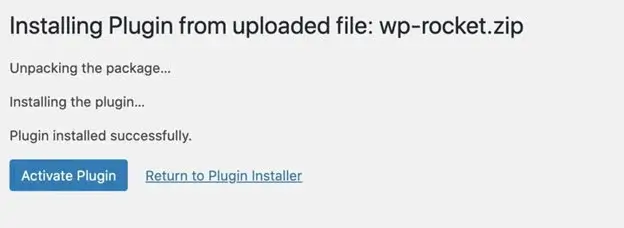
When you click on “Activate Plugin,” your new plugin will become active and start working on your WordPress website.
How to Install a WordPress Plugin via FTP
Before you can use FTP to upload a plugin to your WordPress site, you should have your FTP login details ready. If you’re not sure about these details, ask your web hosting provider for them.
First, you’ll have to download the plugin you want to install. For instance, in this case, we’ll download a plugin called AutoListicle from the WordPress.org plugin repository.

When you click “download,” WordPress.org will give you a zip file. You need to open or “unzip” this file. Once you do that, you’ll find your plugin inside a folder.

Now that you have the plugin in a folder, it’s time to log in to your server.
Use your FTP credentials to log in. You can do this using an FTP program like Cyberduck (which is free for Windows and Mac).

After you’re successfully logged in to your server, go to a place called “wp-content” and then “plugins”. This is where WordPress keeps all your plugins.

When you locate the “/wp-content/plugins” folder, just put the unzipped folder you have in there. Usually, you can do this by dragging the folder into the FTP program.

After your folder finishes getting uploaded to the “wp-content/plugins” spot, you can turn on the plugin. To do this, first, log in to your WordPress site as an admin.
On the left side of the dashboard, you’ll see something called “plugins.”
When you click on that, you’ll find the plugin you uploaded. It will be deactivated, and you can click on “activate” to turn it on.
After you’ve put the folder in the “wp-content/plugins” spot and it’s all done, you can start using the plugin. To begin, log in to your WordPress site as the person in charge (admin).
Look on the left side of the screen, and you’ll see something called “plugins.”
When you click there, you’ll find the plugin you put in. It might not be active at first, but you can activate it from there.

If you can’t find the plugin you added on this page, make sure you put your plugin files in the right place. If the plugin isn’t appearing, it might be because of permission settings. However, if your web host has been set up properly, that shouldn’t be a problem.
And that’s it! You can now install WordPress plugins. Plugins are really important when you use WordPress, so I hope this guide has been useful. If you have any questions, feel free to ask in the comments below.
Related Articles
Leave a Reply